AYA Neo is a console similar to the Nintendo switch or the Steam Deck. You are able to install an operating system on this device with some simple tricks. The process is simple and also the same as you would reinstall Windows 10 on your PC.
This guide will show you how to reinstall Windows 10 on your AYA Neo.
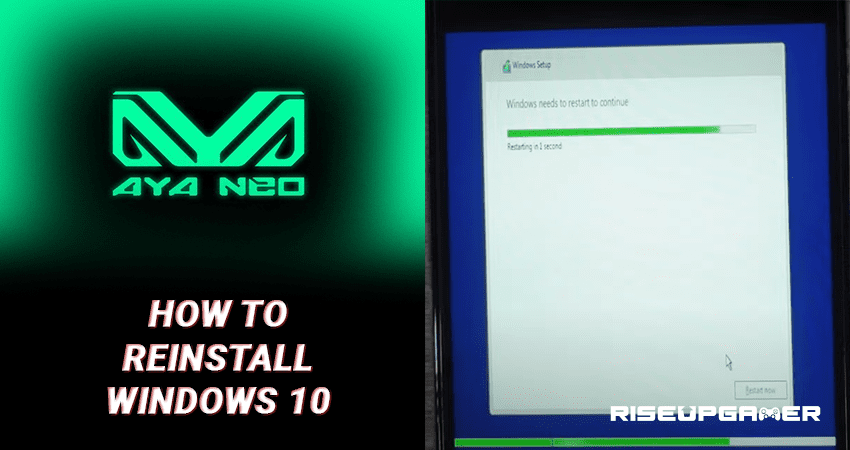
How to Reinstall Windows 10 – AYA Neo
The main requirement to begin this process is a keyboard and a mouse. And preferably a USB Flash Disk with the Windows 10 Installer.
To use the keyboard, mouse, and USB Flash Disk, it’s recommended to use a USB C HUB.
The USB C HUB is a device where it lets you plug in different USB connectable devices that can be converted on the main device through 1 USB cable.

The first step is to download the Windows Media Creation Tool. This is the Windows 10 itself that you will need to place the installer in your USB drive and make a bootable USB port.

With this downloaded, you will flash Windows 10 on your USB and begin your installer.
You will also need to download some other drivers that can be found on the AYA Neo website, which is:
There are only 3 main drivers that you will need to download from this website, which are:
- Good Nine or GoodX Touch Driver
- Gyro Driver
- Realtek Audio Driver

The other important drivers can be downloaded or included in the latest version of Windows 10.
It’s recommended to download the AMD drivers from the AMD website itself. That way you will have the most accurate update for your graphics drivers.

The Drivers that you will download from the AYA Neo website are compressed files. This means that you will need to download WinRar or 7Zip.
Download two more files that are optional for your reinstall but are good and helpful for future activities on the AYA Neo, they are:
- Visual C++ Redistributable all in one package
- Joy XOFF Application.
Once the Windows Media Creation tool has finished, move all the downloaded files to the Support folder of your USB Flash Disk.

Once everything is in its place, begin rebooting the AYA Neo and continuously press on the DEL key on your keyboard.
This will open up the BOOT menu of the windows, and the screen will be tight because the AYA Neo uses a portrait display, meaning that the letters will be small and harder to read.

Go to the Save & Exit menu where on the very bottom of the menu you will see “Boot Override”. Select the USB Flash Media and press enter on your keyboard.
This method will restart your AYA Neo one more time and begin the Windows 10 Installing process.

Continue on the Windows Setup with the:
- Custom: Install Windows Only (Advanced) method.
This will open up a window with all the storage areas you have where you can choose to delete them by selecting each storage area and pressing on the “Delete” option that’s marked with a red X.

Once every single partition has been deleted, automatically only 1 partition will be existent with all the storage available on your AYA Neo and that will be your main storage area with the Windows 10 installed.
Press “Next” to begin the formatting process. From here you will need to wait some time until the process finishes, your AYA Neo will reboot several times for this process to be completed which is normal.

Once the new Windows 10 has been installed, you will begin to set the normal settings for your Windows such as:
- Language
- Time & Date
- Network
- Keyboard Layout and additional Languages
Once you reach your desktop screen, go to the display settings to switch to “Landscape Mode” to help you see better on your new Windows 10.

Your next step will be to install all the remaining downloaded drivers that you previously downloaded from the other windows.
Eventually, you will need to go online so your new Windows 10 can make its updates and keep your device up to date.
Installation for the drivers is simple, you only may encounter a problem with the Gyro and Touch display drivers.

To install these, right-click the .INF files and press install.